
Building a strategy for how to c-bet on ace-high boards with different textures is not an easy task, and there is no better way than to break the strategy into different sections.
Today, we will use PeakGTO to analyze ace-high flop examples.
We will cover both dry and connected boards when tackling these situations both in position and out of position to illustrate strategy differences, and will wrap it up with core takeaways for each situation.
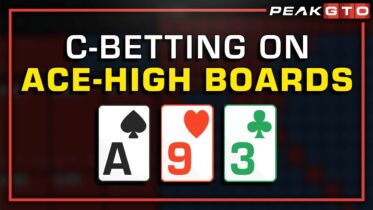
C-Betting On Ace High Boards In Position – As9h3c vs As9d8d
Your c-betting ranges will depend on your and your opponent’s positions, but we will use an example of wide ranges where you open from the button and are called by the big blind.
Here are the assumptions we will be using:
- The hand is played 100 bb deep
- We are opening from the button
- Big blind calls and checks to us on the flop
Let’s take an example of an As9h3c flop when BTN raises before the flop, BB calls and then checks to the preflop raiser.
In this scenario, the solver suggests c-betting 57% of hands and checking 43% of the time while having a mixed strategy with most of your holdings.
It is important to note that you should nearly always use a small bet sizing of around 1/3rd of the pot when you decide to bet on ace-high boards in position on a dry board.
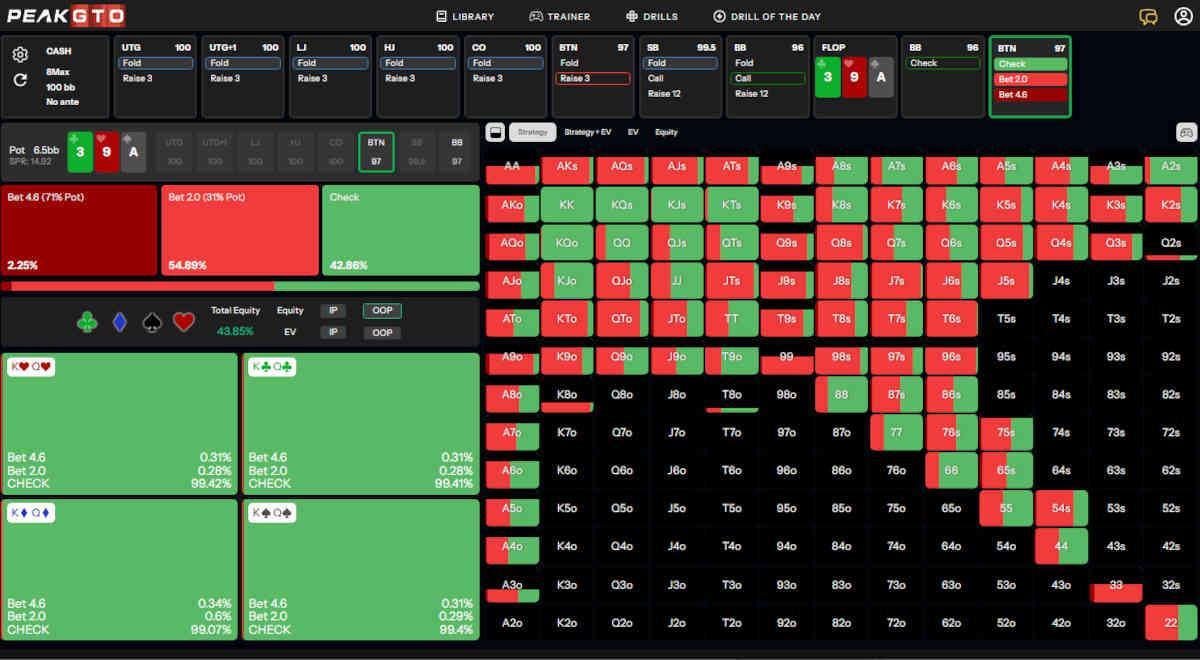
If we take the example of a more connected flop such as Ah9d8d, your strategy changes quite a bit, and you will now check back much more often.
In this situation, you will be betting around 37% of the time and checking almost 63% of your range (compared to checking just 43% on a dry board).
Just like in the previous example, we are using the fairly mixed betting strategy with most of the hands, but this time, we usually pick bigger bet sizing of 2/3rds of the pot on connected boards.
Key takeaways
- Bet more often on dry boards and use small bet sizing
- Check back a stronger range on connected boards
- Pick bigger sizing when betting on wet flops
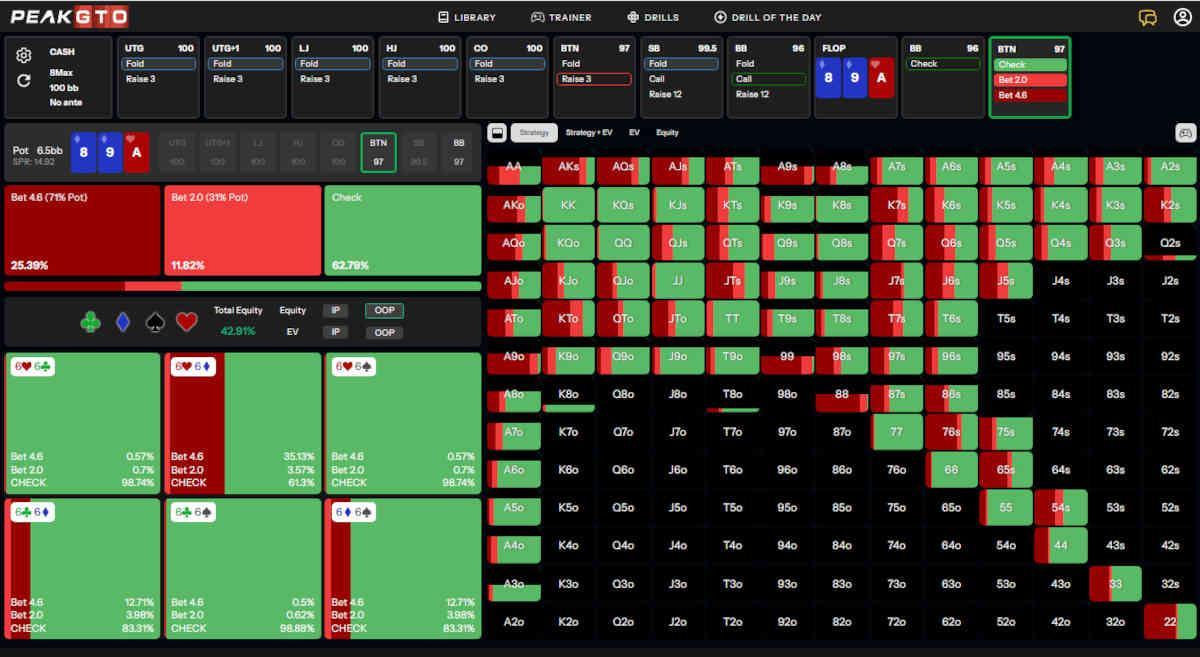
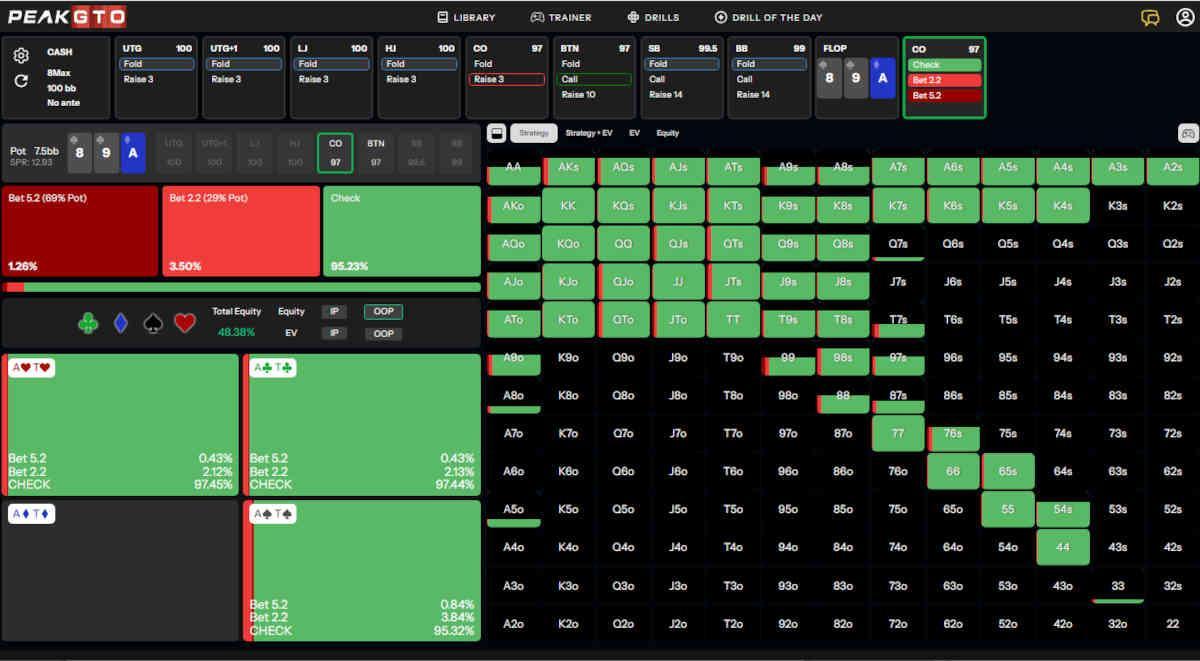
C-Betting on Ace-high Boards OOP – As9h4c vs Ad9s8s
Of course, your strategy changes significantly when you are out of position, so let’s look at similar examples for both dry and wet boards. Now, we will analyze the situation using these core assumptions:
- We are playing 100bb deep
- We are opening from the CO
- BTN calls, and both of the blinds folds
Let’s look at As9h4c to see how our strategy changes when we are OOP.
In this scenario, we only c-bet a small part of our range, betting the bottom set sometimes, a few stronger Ax hands, and some gutshots. That being said, we will check over 96% of the time.
There is no need to get fancy here since checking your entire range makes it very easy to play going forward since you will have all of the strong poker hands.
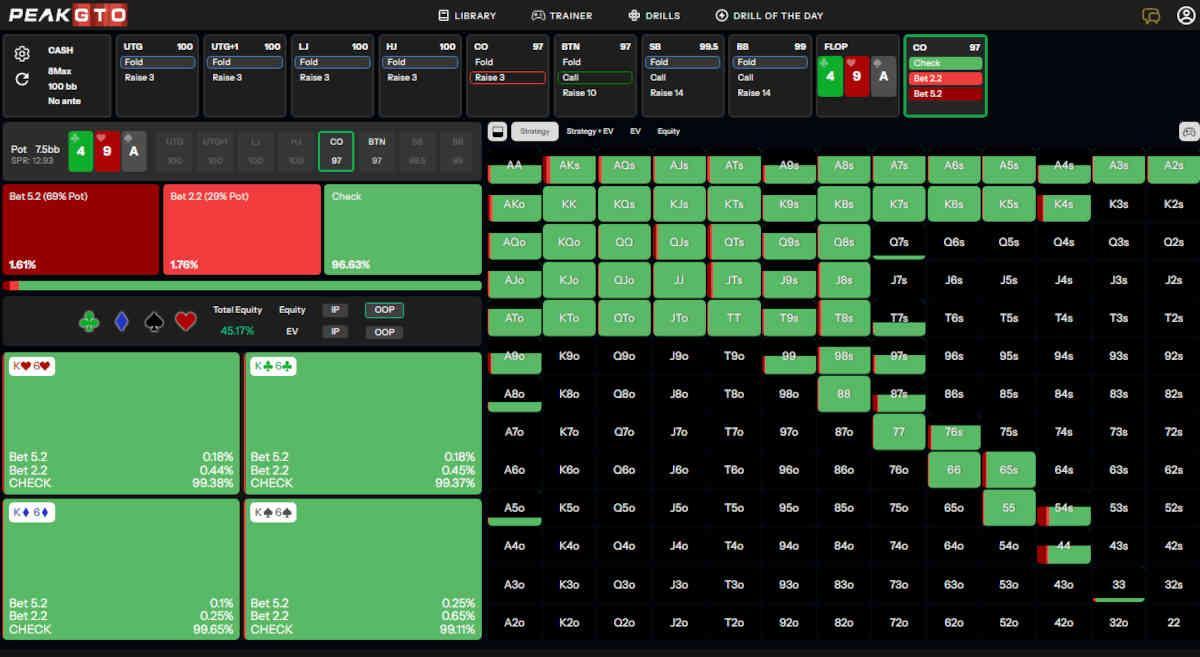
Actually, when you are out of position, you will have to use a very similar strategy, even on connected boards. Let’s take a look at the Ad9s8s example.
As you can see, you will be checking here around 95% of the time, so the initial strategy OOP is very similar on both dry and connected boards, where you end up checking most of the time.
When you face a bet, you will have to apply MDF based on your opponent’s bet sizing.
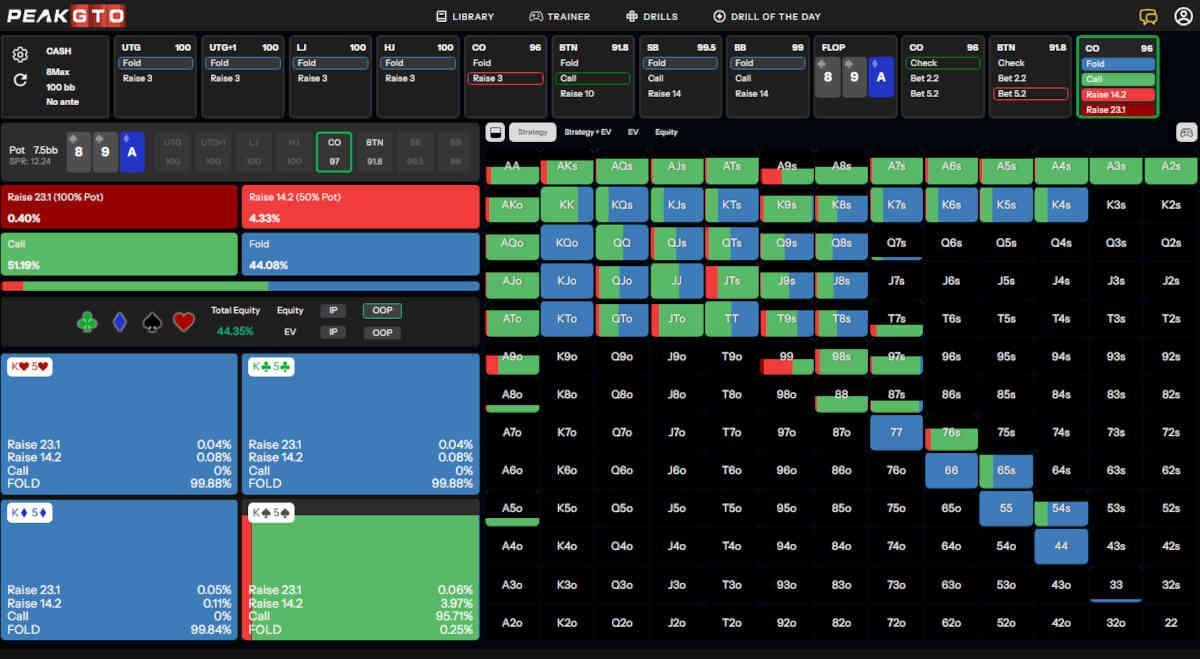
If your opponent is using bigger bet sizing as he should, you need to continue around 56% of the time. From those 56% of your range, you should be calling 51% of the time and raising just around 5% of your hands.
Here, you can apply a very straightforward approach by raising only your strongest hands, like sets and two pairs some of the time, and balancing it out with few open-enders. As for calling, you will want to continue with top pairs, flush draws, and hands that have some equity and fold the rest.
Key takeaways:
- Check most of your hands on ace-high boards when you are out of position
- Defend your range by calling most of the time when you do face a bet after checking
- Have a small check/raising range with your strongest hands, and some of the draws